Wednesday, 13 November 2013

Trendy world map wallpaper décor

12 Nov 2013


Map wallpaper creates an instant effect by drawing attention to the impressive visual.
We know that wallpaper has made a big comeback in recent years as a result of digital print technology, but one trend that is popping up all over the world is decorating a space with wall maps.
Wallpapered.com says while there has always been plenty of choice when it comes to wallpaper, in the last couple of years a new trend of adorning your interiors in murals has emerged. World map imagery in particular has quickly become iconic in the field of interior design.
Informative yet beautiful, stylish world maps can be used as a feature wall or even as a method of keeping track of the places one has visited.
Map wallpaper covering a full wall creates an instant effect by drawing attention to the impressive visual. The world map mural is also an ideal choice for a child’s playroom or bedroom.
The cartography design is an educational and inspirational tool for children of all ages as well as for geography enthusiasts.
Applying wallpaper to walls is a quick and easy way to dress up a wall, as long as the walls are smooth.
Add impact to a plain wall. Applying the wallpaper to your walls is a quick and easy way of dressing up a room, as long as the walls are smooth.
Alternatively, you can use world map wallpaper on stairs, tabletops and to decorate the back of your closet or bookcase. You will find all the supplies you need to apply wallpaper at your local Builders Warehouse.
The information contained in this article is supplied by London-based Wallpapered.com. Wallpapered.com specialise in digitally printing custom wallpaper. They have a collection of World Map Wallpaper designs that are beautiful and comprehensive. They have a large range of modern and antique maps styles to satisfy any interior space.
Article courtesy of www.home-dzine.co.za

Friday, 04 October 2013

4 TV room hygiene and care tips


Thursday nights is TV time for some people and it’s really the only time they walk away from the PC and take a break. This made me think about how much we spend in front of the TV, especially when it’s a sports weekend or soapie time.
As the seasons change, so does the angle of light entering the room. Daytime viewing can be a mission if the sun is shining on the TV or reflecting through a window. Stop the glare by fitting shades or blinds that can be opened/closed or angled to deflect natural light entering the room and spoiling your viewing time.
Here are few tips to make your viewing better and more enjoyable…
1. Don't let greasy fingerprints spoil your view
Switch off the TV before you do any cleaning. Use a lint free or microfibre cloth to clean your TV screen and avoid anything that might scratch the glass, such as paper towels. You don't need to apply cleaners to the screen, just use the cloth and wipe the screen from left to right, starting at the top and working your way down in a single wipe. This will clean up any greasy marks and remove dust.
2. Dust up the speakers
Most people would simply wipe with a damp cloth or furniture polish but this pushes the dust inside the grilles - rather use a soft makeup brush to lightly brush over speaker grilles to remove dust and then wipe with a lint-free or microfibre cloth.
And don't forget to clean circulation grilles and vents at the back or side of the TV. These vents help to keep the inner workings of your TV cool, so prevent dust from blocking them up.
3. Detox the remote
Baby wipes are ideal for cleaning a TV remote and for wiping off last night's TV dinner. Plus, a regular cleaning with baby wipes will keep your TV remote germ-free. Switch off the TV before you clean or you will be surfing through channels and changing your settings before you know it.
If you have a PVR you will know how handy the rewind/fast forward/pause button is and how you can easily get into a panic when it gets stuck. Chances are the button is all gunked up and you can easily open up the remote to clean out any gunge. Do take care when opening and make sure you put everything back properly.
4. Take the glare out of TV
As the seasons change, so does the angle of light entering the room. Daytime viewing can be a mission if the sun is shining on the TV or reflecting through a window.
Stop the glare by fitting shades or blinds that can be opened/closed or angled to deflect natural light entering the room and spoiling your viewing time.
If you're not prepared to fork out for window treatments, try angling the TV or moving it to a new spot. - Janice Anderssen
Article courtesy of www.homedzine.co.za

Tuesday, 01 October 2013

Dressing table with silver leaf finish


When you discover a secondhand find that is still is good condition, you can do almost anything with it. You can restore it, paint it, or you can add silver leaf and transform a plain dressing table into a gorgeous piece of modern furniture.

That's just what Virginia did at livelovediy - and it turned out awesome.


Here's how the table looks after being covered with silver leaf and with the addition of a glass top... absolutely stunning.


All you need for this project is some silver leaf, size (glue), a foam sponge pad and a paintbrush.
You will find silver leaf at craft and hobby stores, or get in touch with Brasch to find your nearest supplier.


GOOD TO KNOW
Put down a dropcloth or newspaper before you start - gilding can be messy!

To cover furniture in any kind of leaf you first need to apply size (glue) over the surface.
Work in sections and apply size to the surface and allow to dry until clear, or for approximately 20 to 30 minutes.
Gently lift a sheet of silver leaf and place over the size.
Brush with a soft paintbrush.


To cut down on the amount of silver leaf used for this project, Virginia spray the legs with Rust-Oleum metallic finish.
You can use Rust-Oleum Universal - titanium silver to achieve a similar effect.


To finish off the table and for added protection, a glass top is added to the dressing table.
You can have 5mm glass cut to size at your local Builders Warehouse.


- See more at: http://www.home-dzine.co.za/bedroom/bedroom-silver-leaf-dresser.htm#sthash.h68EDCaP.dpuf


Tuesday, 10 September 2013

Paint your new home before moving in


You have bought your first property, but now you want to turn your new house into your new home by adding some personal touches. The best way to do this in a relatively cost effective and easy way is by giving the home a new coat of paint.
Not having to move furniture around or cover it up will save a lot of time when painting.
Adrian Goslett, CEO of RE/MAX of Southern Africa, says not only is it a fun and exciting project for new homeowners, but is also gives the home an updated, refreshed look.
He says just by adding a fresh coat of paint, the home will immediately seem cleaner, more welcoming and more like yours. He says according to home décor experts, the best time to paint the interior of a home is before moving in for a number of reasons.
Reduces the effort
It is far easier and less physically challenging to paint the inside of a home when there is no furniture in the way. Goslett says having an empty room will help you move around more freely and place a step-ladder in and around the home with far less effort.
He says painting after the furniture has been moved in will mean manoeuvring heavy objects around to get to hard to reach places.
Saves time
Not having to move furniture around or cover it up will save a lot of time when painting. There will also be a lot of time saved from not having to take down any art or pictures from the wall.
Saves money
Goslett says if the new homeowner is painting the home themselves there won’t be much money saved, however, if they have hired a professional painting contractor or some workers to do the job it can possibly save them in costs.
“The painters will be able to move from one room to the next far faster, which will save money if they have been contracted on a daily rate. Less time spent on the labour will essentially mean less money spent on labour costs.”
Protects your furniture
It is simple, if there is no furniture in the home, it can’t get ruined. Goslett says regardless of how careful the new homeowner or a painting contractor is when painting, there is always the chance that paint could spill or paint specks could find their way onto the furniture or into electrical appliances.
He says that could be a rather expensive fix depending on where the paint lands.
Decorating the home
This is particularly true if the homeowner has not yet bought any décor items for their new home. Having a specific colour palette to work from will make the process of decorating a room far easier, says Goslett.
He advises that if you are unsure when choosing paint colours, you should test several shades of the colour selections on the wall in a section of your new home. The painted area should be allowed to dry for 24 hours before viewing it, he says.
“View the colour swatches in the morning, noon and evening, as the colours will appear to be different tones depending on the time of day. This will give you the chance to compare the shades to see which one is best for you.”
Goslett says purchasing a new home is an exciting time and painting your home is a great way to express your individuality and ensure that your home reflects your sense of style and personality.


Thursday, 23 May 2013

Need advice on painting floors?


Need advice on painting floors?


Need to give your home a makeover? Paint is still one of the easiest and most affordable ways to instantly update a room - no matter what surface you paint. And paint is not just for walls. With proper preparation and the right paint you can paint just about any surface in and around the home.


white home living painted

Get started


There are a few tips you should know beforehand, and these will ensure a professional paint job on a wide range of surfaces. Let's look at a few basics...

  • Always follow the instructions. Short-cuts normally end up in mess-ups, so take the time to read and follow the manufacturer's guidelines for each product.
  • Prep surfaces as required. All surfaces will need a thorough clean - or sanding - before painting. If you're not sure what is required, check the package instructions or browse through our articles on Home-Dzine. Polycell Sugar Soapis an all-round product for cleaning prior to painting.
  • Work in a well-ventilated area and wear safety glasses and dust mask when required.
  • While primer may not be essential for all painting projects, where recommended use a primer. A primer improves the bonding of paint to surface and extends the life and durability of any painted finish.

Paint ceramic tile


Ceramic wall tile can be painted over. Many readers ask if they can paint floor tiles and unfortunately the answer is, no. Floor tiles are subjected to everyday traffic, and because ceramic tiles are non-porous and unable to absorb the primer or paint, the painted layer will soon wear away.

paint ceramic tile

Plascon Tile & Melamine Primer
Plascon Velvaglo
Foam roller (or roller with extremely low pile)
Small paintbrush for corners and around fittings
Masking tape - to mask off areas not to be painted
Polycell brush cleaner

  1. After cleaning, give tiles a light sanding with 120/150-grit sandpaper and then wipe clean. Let the surface dry.
  2. Apply Plascon Tile Primer to the tile surface and allow to dry before lightly sanding with 220-grit sandpaper.
  3. Apply a second coat of Plascon Tiler Primer and again, let this dry and lightly sand before applying Plascon Velvaglo as the top coat.
If you don't want to paint over the grout, apply self-adhesive tape over the grouted areas. Automotive tape is thin enough to easily cut into strips and place over grout lines while you paint. Remove the tape when the paint is dry to touch but not completely cured (after about an hour).


Paint laminate floors


Scuffs and scratches on laminate floors can be covered up to a degree, but if you are looking for a completely new look without replacing floors, then painting a laminate floor is an option.

paint laminate floor

Preparation is the key to a lasting paint finish on laminate floors and you will need to spend a fair amount of time on prep before you start painting. It's also a good idea to choose a small inconspicuous spot to try out before you paint the entire floor, as not all laminate floors are the same.


Plascon Wall & All
Foam roller (or roller with extremely low pile)
Extension pole
Small paintbrush for corners and around fittings
Masking tape - to mask off areas not to be painted
Orbital sander plus 180-grit sanding pads


  1. Sand the entire floor (or tester spot) with 180-grit sanding pads to degloss the finish. Most laminate floors have a layer of plastic coating over the top that protects the wood grain image below - you don't want to completely remove the plastic, just remove the glossy finish so that paint has something to bond to.
  2. Wipe clean to remove all traces of dust.
  3. Apply the paint directly onto the sanded floor using a foam roller. Pushing an extension pole into the handle of the foam roller makes painting easier and puts less strain on your back.
  4. Let the paint dry overnight before applying a second coat.
Note: As with laminate floors, once painted the finish is not waterproof and this technique is not recommended for areas where there is high traffic. This technique doesn't offer a permanent solution, but rather one that can be used until you can afford to replace flooring.


Paint melamine


Melamine and laminate finishes are predominant in most homes and used for built-in cupboards and cabinets. Over time the finish yellows with age and can easily be painted over for a fresh, new look.

paint melamine laminate door

Plascon Tile & MelaminePrimer
Plascon Velvaglo (gloss) or Kitchens & Bathrooms paint (matt)
Foam roller (or roller with extremely low pile)
Small paintbrush for corners and around fittings
Masking tape - to mask off areas not to be painted
Polycell brush cleaner

  1. After cleaning, give melamine a light sanding with 180-grit sandpaper and then wipe clean.
  2. Apply Plascon Melamine Primer to the surface and allow to dry for the specified time.
  3. Apply Plascon Velvaglo or Plascon Kitchen & Bathroom paint as the top coat.
Note: Plascon Velvalgo offers a glossy finish that is easy to keep clean while Plascon Kitchens & Bathrooms paint has a matt finish that is not as washable.


Paint a hardwood floor


Once sanded, hardwood floors can be painted, whitewashed or limed as desired. As with all surfaces to be painted, the key to a lasting finish is in the preparation.

paint hardwood floor


Plascon Wall & All or Plascon Velvaglo - click here for liming and whitewashing
Foam roller (or roller with extremely low pile)
Small paintbrush for corners and around fittings
Masking tape - to mask off areas not to be painted

  1. A previously varnished, sealed, waxed or painted floor should be sanded with 80-, 120-and 240-grit sanding pads to remove the existing finish. Click here for tips on sanding a hardwood floor.
  2. Make sure the entire floor is completely dust free before painting.
  3. Apply Plascon Wood Primer before painting with Velvaglo to ensure proper adhesion.
  4. Apply Plascon Wall & All or Plascon Velvaglo as the top coat. Follow the instructions on the can for application and drying times.
Note: If using Plascon Velvaglo the surface can easily be cleaned with an ever-so-slightly damp mop. This technique is not recommended for areas where there is high traffic.

Paint vinyl floors


Where vinyl flooring is still in good condition, rather than rip out and replace, you can paint a vinyl floor. Once painted, you can add a stencil or pattern to your vinyl floor.

paint vinyl floor


Plascon Tile & MelaminePrimer
Plascon Velvaglo
Foam roller (or roller with extremely low pile)
Small paintbrush for corners and around fittings
Masking tape - to mask off areas not to be painted
Polycell brush cleaner

  1. A thorough cleaning is required to remove all traces of grease and wax polish.Plascon RemovAll Degreaser is recommended for floors that have been regularly polished.
  2. Lightly sand the surface of vinyl floors with 240-grit sandpaper and then wipe clean.
  3. Apply Plascon Tile & Melamine Primer to the surface and allow to dry for the specified time.
  4. Apply Plascon Velvaglo as the top coat; re-coat and allow to dry as per the instructions.
Note: Experts advise against painting cushioned-sheet flooring, as furniture and heels will dent the surface and crack the paint. Add Plascon Grip Additive where a non-slip finish is required.


Paint a concrete floor


Many homeowners are making the decision to leave out conventional floor coverings and opt for the convenience of a painted concrete floor. You can paint a concrete floor as long as the existing surface is in good condition, or a screed has been applied. This technique is not recommended for wood-screeded or rough, raw concrete floors.


  1. The concrete finish must be in good condition for painting, and you will need to give it a good clean before painting. Any cracks can be repaired with Polycell Masonry Patching Plaster or Polycell Rockset - both of which need time to dry before being painted over. Scrub the floor with Plascon RemovALL High Strength Degreaser and then rRinse with clean water and allow to dry.
  2. Apply Plascon RemovALL Rust Remover and Concrete Etcher to ensure a longer lasting finish. Follow the instructions and allow to dry.
  3. Apply paint with a foam roller for a brush-stroke-free finish.
Note: Add Plascon Grip Additive where a non-slip finish is required. Although not recommended by Plascon, you can also use Plascon Polvin tinted in your choice of colour to paint as a top coat for interior floors; follow this with two coats of polyurethane sealer.


Janice Anderssen

Tuesday, 15 January 2013


Find your home’s signature scent


What makes it so impossible to choose a scent for your home is the number of fragrances that are available on the market.
Scents that mirror a minimalist décor style are clean linen, cotton fresh or a fresh citrus fragrance.
But unless you have an appreciation for the eclectic, like a woodsy scent in a house characterised by plastic furniture, you should be looking for a fragrance that fits in with your décor.
This was the message at the Glade Inspirational Fragrances Sensorium launch, which took place late last year at Melrose ArchJohannesburg.
Michelle Cloete, Glade’s marketing manager, says fragrance is just as important as furnishings and lighting.
The Sensorium showcased how home design and fragrance complement each other.
Décor should be a feast for all of your senses, with scent unifying the various elements and enhancing the overall experience, says Cloete.
Romantic floral scents like rose, jasmine and lavender work well in Victorian and cottage chic surroundings.
Here’s a rundown of décor styles and their complementary fragrances…
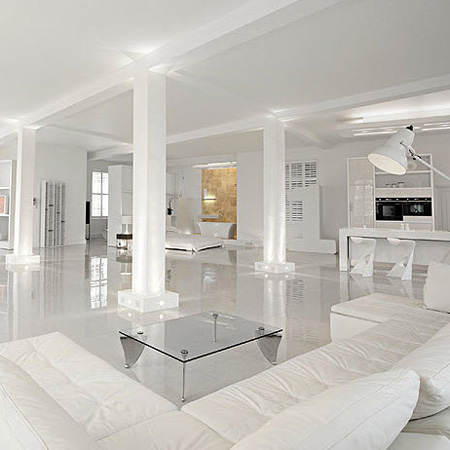
Clean fresh aroma
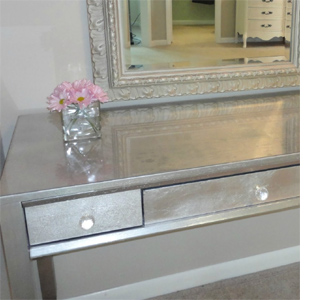
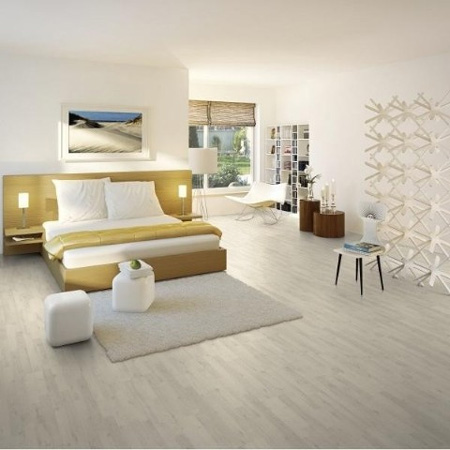
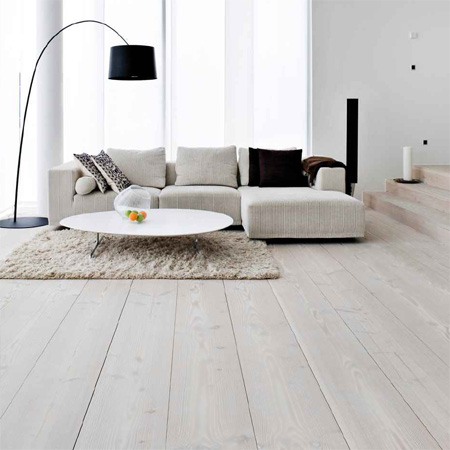
If you’ve fallen in love with strong lines, slick surfaces and a well organised interior then your design style is minimalist.
What attracts you to this look is the idea that less is more. You keep everything in its place or in stylish trays and boxes, and you make no room for clutter.
When it comes to colour, you tend to favour lighter hues and neutrals over bold and vibrant brights. You enjoy the look and feel of stainless steel appliances and plenty of room to breathe.
Scents that mirror your décor style are clean linen, cotton fresh or fresh citrus.
Romantic floral scents
Coastal themed décor is best complemented by ocean breeze, pineapple, coconut and other tropical scents.
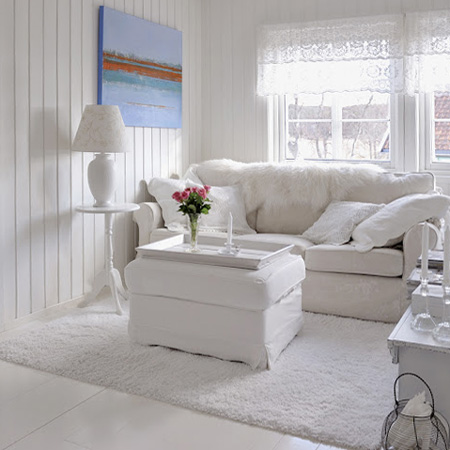
Classic furniture and a romantic colour palette best describe a Victorian or cottage chic design.
The fabrics and walls in this home often range from a soft pink to purple, with floral prints on rugs, curtains and vases.
Wing back chairs are a favourite and delicate, light linens make up the master bedroom.
Cloete says a room’s décor and design creates a certain atmosphere and as fragrance similarly appeals to the senses, the chosen fragrance needs to enhance the feel that is wanted in the room.
For that perfect romantic match choose a sweet floral fragrance like rose, lavender or jasmine.
Woodsy notes
A love for wood is often expressed in antique furniture, oversized leather couches and dark woods.
If you fall into this category, your style is influenced, not by the latest trends, but by what suits you and your surroundings.
Your home is warm and inviting, and the signature scents for your home are pine, cedar, cinnamon and amber.
Beach fragrances
Coastal themed décor features aqua blues and whites, and splashes of coral oranges and reds.
Life in this home is all about the accessories – the seashells, the coral, some driftwood and nautical frames.
Seaside interiors create an air for entertaining.“Fragrances evoke a certain mood in a room and work conjointly with the décor to create the desired atmosphere.”
Ocean breeze, pineapple, coconut and other tropical scents work well in these surroundings. – Katlego Sekano 


Friday, 11 January 2013


Restore and prevent cracked leather


A leather lounge suite can be a good investment for your home furniture. It is resistant, long lasting and can be accessorised with just about anything.
A leather lounge suite is a good investment as it will last a long time if it is maintained correctly.
However, as the leather gets older, cracks will start to appear if the leather is not conditioned regularly. Normal household furniture polish won't condition leather, it will only give it a false shine.
It's important to regularly clean and condition leather furniture with the correct products to keep them looking good and extend their lifetime. Once the leather starts to crack there isn't much you can do to repair it, but you can clean and apply leather conditioner to soften the look and prevent further damage.
Cracked leather is a common problem on leather furniture that is not maintained properly, and one that leather restoration experts can easily fix, but like most things with leather furniture, it's far cheaper to take care of the problem before it becomes an issue.
What causes leather to crack?
A regular cleaning with saddle soap and leather conditioner ensures the top of the leather stays clean and supple.
Leather is porous, so it soaks up oils and dirt from your body and hair. These oils are absorbed into the top coating on leather and become abrasive as it breaks down, causing wear and eventually, cracks on the surface.
How to maintain leather
It is important to clean and condition leather furniture at least twice a year. This removes any dirt and oil still sitting on the surface of furniture and prevents it from soaking in.
A regular cleaning with saddle soap and leather conditioner ensures the top of the leather stays clean and supple and because the seating cushions, backrest and arm are under constant wear, it is more important to pay particular attention to these areas.
1. After cleaning the suite, any large cracks you see can be stuck down using leather glue to prevent future cracking. Apply it according to the instructions and be sure to wipe away any excess glue that oozes out.
2. Use a soft sponge to apply leather balm over cracked areas. Follow the instructions.
If you maintain your leather lounge suite correctly, there is no reason why your family can't enjoy its comfort for many years.
Light coloured leather furniture may need cleaning before restoring the leather and applying leather conditioner. Saddle soap, or pure glycerin soap is the best product to use for cleaning leather. This soap doesn't contain any harsh chemicals that will damage the leather.
Use a clean, soft shoe polishing brush to apply saddle soap and to brush clean the surface.
A specialist leather cleaner will clean leather safely and effectively. These products are designed to loosen and lift out embedded grime. Apply and rub off with a damp cloth and after cleaning, condition with leather conditioner.
Leather Conditioner is the most effective way to restore leather. It nourishes, softens and protects while extending the life of the leather. Use it as a regular maintenance program to keep your leather furniture looking good.
Tip: Leather conditioner may darken light-coloured leathers. Apply with a damp cloth.
If you need to dye leather, make sure that you use a dye specifically designed for leather. Eco-Flow leather dye is available and comes in a variety of colours.
Article courtesy of www.home-dzine.co.za

Tuesday, 08 January 2013


Colour trends for summer 2013


A new year means new energy and what better way to start 2013 than by injecting that energy into your home with a selection of brights from Plascon’s 2013 Colour Forecast.
Dragon’s Hide, a green that is enjoying popularity now that Pantone has announced emerald green as its 2013 Colour of the Year, provides that understated elegance.
Internationally acclaimed colour expert and Plascon’s colour manager, Anne Roselt, says Plascon’s Colour Forecasts are a blend of the latest, local and international trends.
She says each colour plays a vital role in translating the trend that they see in a multitude of industries.
“These trendy brights will bring that colourful spark to summer, whether they’re painted on a wall or on tired furniture that is in need of revitalising.”
Roselt brings a wealth of knowledge and longstanding expertise to bear on her choice of colours for Plascon’s forecast, and her 2013 selection is proving its accuracy over and over in the current popularity of colour choices in both fashion and home décor.
Simplicity
As the name suggests, Simplicity is about stepping out of the chaos and into the calm.
Dragon’s Hide, a green that is enjoying popularity now that Pantone has announced emerald green as its 2013 Colour of the Year, provides that understated elegance. This hue is about creating serenity and works well with raw textures to create a modern sanctuary.
This palette is best used in small doses, in the form of accessories such as side tables, ashtrays, vases or cushions.
Golden Daffodil is a rich yellow representative of the retro 60s. This is a concentrated, sassy palette that can be paired with deep blues or greys in varying designs in the home.
Contrast
The theme of Contrast aims to build a centred atmosphere within the home by using contrasting colours to create a contemplative and grounded feeling. 
Golden Daffodil and Fuscia Fizz are the perfect high contrast brights.
Golden Daffodil is a rich yellow representative of the retro 60s. This is a concentrated, sassy palette that can be paired with deep blues or greys in varying designs in the home.
Fuscia Fizz is for the forward thinking. It is a statement colour that can be ‘braided’ in among blacks, greys or metallic pieces.
In both cases, the contrast makes for stunning accents on a feature wall or individual items such as vintage bedside lamps, cookware or a bright powder sofa.
Sunset in the Desert is a fun, retro orange that brings a spark to interiors without overpowering them.
Dare
Dare is perhaps the most vibrant theme of the forecast. This category of colour is vivid without being overwhelming and outrageous.
The colours for this year are Hot ‘n Spicy and Sunset in the Desert - strong uplifting colours that are pefect for colour-blocking.
Sunset in the Desert is a fun, retro orange that brings a spark to interiors without overpowering them.
A Hot ‘n Spicy feature wall cannot go unnoticed. This is the perfect colour for statement areas in the home.


Monday, 07 January 2013


Security measures on home show days


The installation of security guards, asking visitors to produce identity documents and to leave any bags at the door are common practice at show houses open for the day to visitors.
An agent should be present on show days, move around and keep their eyes open to ensure that visitors are not left alone too long, therefore preventing the chances of something being taken from the hosue.
However, it is not excessively cautious or paranoid. Nancy Todd, regional sales manager for the Rawson Property Group in theWestern Cape says it is necessary because ‘light fingered’ visitors have occasionally helped themselves to small, easily carried items.
In some cases, they have used colleagues to distract the attention of house sitters or agents and have managed to remove fairly big items, such as paintings and garden hoses.
Todd says when agents are aware of the danger they can usually prevent thefts simply by moving around, keeping their eyes open and ensuring that visitors are not left alone too long.
They can also improve matters by controlling the influx of visitors to the home.  They should, however, also insist that all valuables be locked away on show house days and some have even asked domestic staff to stay on for the day.
Todd discourages the seller from being in the house on show days because it can cause sensitive visitors to avoid asking questions that might seem insulting to the owner.
This then means that they don't deal with issues that should be discussed and they move on without having the full merits of the property being explained to them.


Wednesday, 02 January 2013


Jazz up your ceiling with colour


The most obvious colour for a ceiling is white, but not every ceiling has to be the same dull colour. Why not paint the ceiling in other bold colours or add a texture finish?
Painting the ceiling a bold colour can make it drop down visually, which makes the room seem smaller, lower and cosier.
Painting the ceiling a bold colour makes it drop down visually, which makes the room seem lower and cosier. By painting the ceiling in a darker colour these high-ceilinged rooms have been visually altered so that the ceiling appears lower than it actually is.
In a room with very high ceilings, if you want to visually lower the ceiling consider painting the ceiling in a colour darker than that of the wall colour. Adding decorative moulding will also visually lower the ceiling by drawing your eye to the detail.
You can also choose to paint the ceiling in the same colour as the walls, which will create the opposite effect to the one mentioned above. The ceiling will appear to float above the room, creating a sense of height and spaciousness. If it is a room where you spend a lot of time looking at the ceiling, so why not paint it and make things interesting.
Remember to incorporate the furniture in the room when choosing the colour you want to paint your ceiling, as certain colours will help make the furniture pop.
Tip: While you can choose any colour on your ceiling, keep in mind that dark colours make the ceiling lower, while light tones allow the ceiling to hover effortlessly above.
Consider painting the ceiling in a tint of the wall colour. For example, if your walls are a light or pale blue, then your ceiling would be the very lightest blue on the colour swatch. This will help to round out the room and make the ceiling part of the overall decor and not just a white sheet over the top.
The colour you choose for a ceiling is affected not only by the natural and artificial light in a room, but also by other colours used in the space.
When choosing a colour for the ceiling do the same as you would for the walls. Select paint swatches and attach them to various corners of your ceiling. As the light and shadows play on your samples, you will soon see how this affects the various swatches and will help you to choose the best one for the ceiling in that room.
In a dark or south-facing room, a white ceiling will help bounce light back into the room, but light colours on the ceiling will have the same effect.
Wall colours have become more adventurous over the years, moving away from the standard white to a rainbow of colours. This move has brought about more interest in the '5th" wall - the ceiling. White is rarely the best colour to use, particularly if bold wall tones are injected into your living area.
You can opt to paint the room all the same colour but mix things up by painting the ceiling the lightest shade of the colour or the darkest shade, to give the room a bold look.
In a room with dark, solid colour, the alternative is to select a colour that is lighter than the wall colour so that the room does not feel claustrophic.
You can paint a ceiling in a variety of colours, unless the ceiling is heavily textured or patterned and therefore very difficult to paint well. In this case, painting it anything other than white will call attention to it and maybe that’s not what you want.
A nice contrast in a plain white room is to select an accent colour and apply this colour to the ceiling. It is not recommended for a low ceiling, as the effect is dramatic.
As for paint techniques and textured ceilings, if the right colours and textures are used there is no reason why you cannot apply it to a ceiling. Applying a paint technique can unify a room by bringing together the elements in the space.
Black walls and a satin black ceiling allow everything else in the room to stand out. By painting the walls and ceiling in the same colour, depending on whether the colour is dark or light, the ceiling becomes part of the background of the room. Other items in the room such as the furniture or accessories will draw the eye and be more visually apparent.
If painting seems like too much work, think about adding wallpaper to the ceiling. The eye-catching ceiling detail really adds more effect to this country kitchen. A word of advice, make sure you apply the wallpaper paste over the entire paper and particularly the edges. The last thing you want is wallpaper peeling off the ceiling.
Article courtesy of www.home-dzine.co.za